
Nori Rice Glue: Make your own September 23, 2020 – Posted in: Art, Crafts, News

When I just started practising tsumami-zaiku, I didn’t know how important the glue was, which gave me a lot of agony and grief. Hopefully, this post will provide some basic information for you. For the record, I am an artist, not an artisan. I learnt the craft on my own, and I have never been to any workshop or formal training. The things that I will be talking about are only what I learnt from my experience and research. But hopefully it will help you to find the glue and method that are best for you. I suffered, so that you don’t have to.
Gluing method and glue
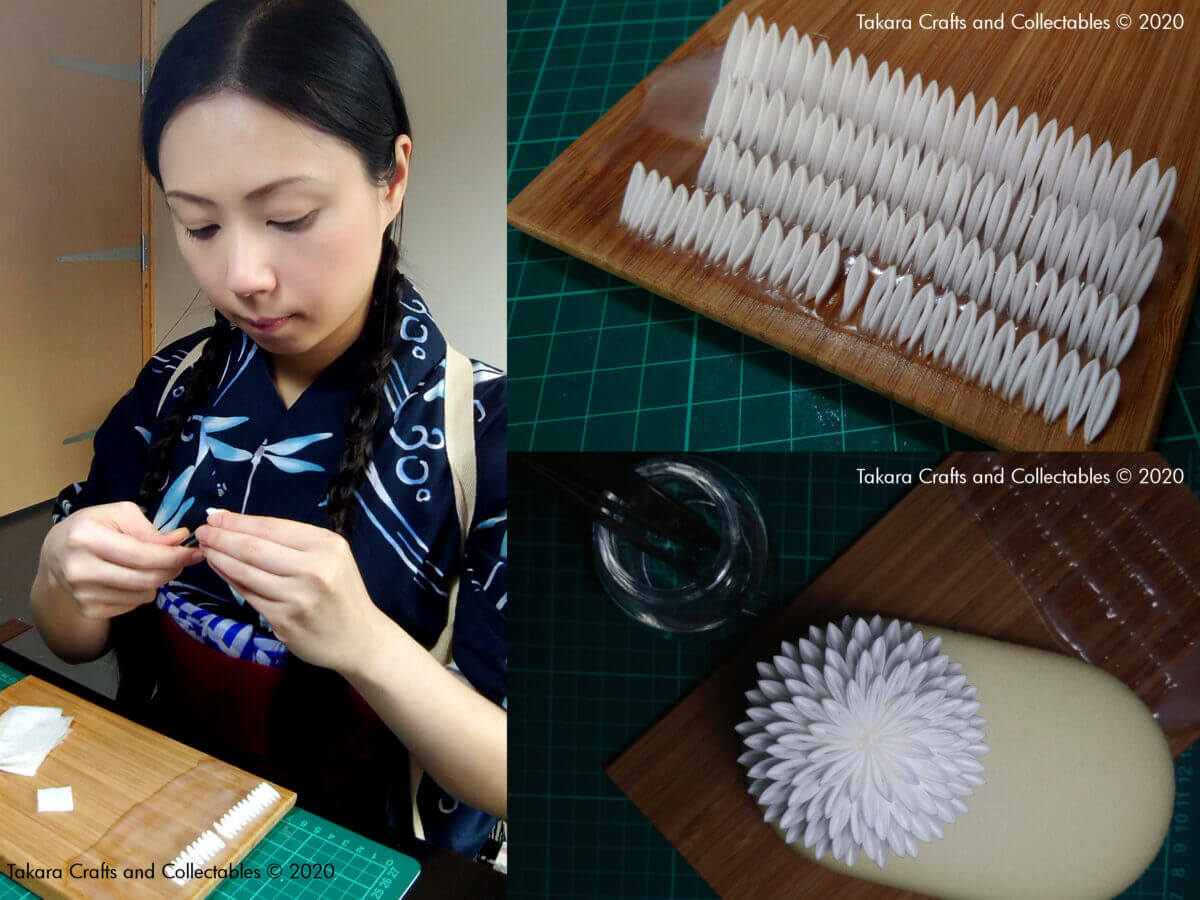
When I first learnt about the craft, I found two ways of gluing. The first way is the traditional method – Before you start folding, you spread the glue onto a wooden board, then you put the folded fabric onto the glue. The glue we use in this method is called Hime-nori, which literally means “princess glue”. Hime-nori is made with rice and has a very viscous, almost solid texture. It takes more time to dry, which gives you time to make a large number of petals before you have to put them onto the mount. Also, because the glue is very viscous, it will hold the shape of the fabric for you.
However, because the glue is made with rice, it has a short shelf life and it is not easy to find the glue outside Japan. This is why the second method may be better for the people who live in the rest of the world.
(Edit: Some fibers, such as polyester, are crease-resistant, which makes them unsuitable for tsumami-zaiku. Choose fibers such as cotton and silk which can be easily folded. It is also best to use a very light weight fabric.)
The second way is the modern craft glue method – You put the glue onto the edges you intended to glue as you fold the fabric, then apply pressure onto the glued edges and wait for it to dry. For the people who don’t have access to hemi-nori, this method is very convenient. Also, craft glue has a much much longer shelf life and dries a lot quicker, so this method is more advantageous in some aspects. You can add water resistance to your project by using a water resistant glue.
Fabric glue for Tsumami-Zaiku
Not knowing any better, when I first went to buy glue, I went to “The Works” (which, as Stewart Lee put it, is a book shop that “appears to be run by people who have a deep-seated suspicion of books” ). I went in there and picked up the cheapest 1L tube of “craft glue”. Needless to say, when I pour it out, it was just a pool of watery mess. Then I remembered what my mum taught me – Things are cheap for a reason.
After that incidence, I tried to look for a better glue. I went to an independent specialist craft shop (i.e. The vendor at my local market) and got a tube of actual fabric glue. The glue has a much thicker consistency, it holds the fabric properly, and it dries quickly. This is the glue I am still using today.
But, like other people who are passionate with their hobbies and interests, I wasn’t satisfied. I don’t want to be stuck with craft glue forever (pun intended). I am making my own rice glue.
Making rice glue
Like many people who live outside Japan, my first problem was that I have never seen hime-nori in real life, not even now. I have never touched it and worked with it, so I have no idea what its viscosity, stickiness, and water content really are. The best thing I could do was to look at images on Google, find a recipe, and try it out for myself.
Recipe #1
The first recipe I found came from Mrs. Laura Boswell, who is a famous British printmaker specialised in traditional Japanese woodblock printing. According to her blog post, she was having trouble to find the right rice glue for woodblock printing and decided to maker her own. Eventually, she found a recipe from a book called “The Art and Craft of Woodblock Printmaking” and it goes like this:
“Mix 20g rice flour with 100ml of water. Boil 150ml water in a pan. Add the paste into the hot water and stir. Bring the mixture to the boil and keep stirring until the mixture is translucent.”
This recipe hasn’t specify which kind of rice flour it uses. However, given that it is Japanese rice glue, I suspect it is made with joshin-ko. If I scaled down the recipe into ratio, it can be summarised as: 1 part of rice flour (in grams), 5 parts of room-temp water (in ml), and 7.5 part of hot water.
Recipe #2
The second recipe I found came from an essay published in a journal called “Sugino Gakuen Kiyou”. The essay was written by Mrs. Motoko Kawaguchi, an expert in tribal embroidery, and the title of the essay was translated as “Making of an Artificial Flower Using Chemical Fibre”. The essay included a number of glue recipes and one of them was a hime-nori recipe. It says:
“Dissolve 14g of Joshin-ko into a tablespoon of water. Then, pour the mixture into 200 ml of hot water. Heat it up on a stove until translucent.”
This recipe specifically uses joshin-ko, but it uses a lot less water (1tbsp ~ 15ml) to dissolve the flour. In terms of ratio, it can be roughly summaried as: 1 part flour, 1 part water, 14 part hot water. This recipe uses a bit more water, but the basic principals are the same: Dissolve the rice flour with room-temperature water, pour it into hot water, then keep stirring and heating it up until it becomes translucent. Sounds easy enough, right? Well, the main problem is, I can’t find Joshin-ko in my area. Different types of rice have different properties, and therefore it will change the outcome of the glue. Nonetheless, I went to my favourite local Asian supermarket to see if I can find a substitute.
Experimenting with different types of rice flour
Experiment #1
Eventually, I bought some Indian rice flour and gave it a go. When the glue was freshly made, it looks similar to hime-nori. But unfortunately, when the mixture cooled down, it became more solid and split, and I bought a whole kilo of the stuff. (Well, at least we can make dosa now.) Obviously, Indian rice flour hold less water than Joshin-ko, most likely because it is made with long grains.
Experiment #2
I later tried Thai glutinous flour, which is similar to mochi-ko. This type of flour can hold more water and should provide a more glue-like consistency.
The glue came out more watery than it should be, but it did look more like glue. I actually used it for a while, because, somehow, it didn’t occur to me that I can mix the two to improve the glue. (duh)
Experiment #N
After a few experiments, I came up with a recipe which gives me a mixture that is very similar to hime-nori. Firstly, I used 2/3 parts of Indian rice flour and 1/3 part of Thai glutinous rice flour to create the flour mixture. Then, dissolve the flour mixture into 5 parts of water and mix thoroughly. Gradually pour the solution into 5 parts of hot water. Keep heating and stirring the mixture until it becomes translucent. There you go. Glue is ready. It’s still not exactly the same, but it looks very similar and works quite well. And if you keep the glue in the fridge, it can last around a week.
Wrapping up and other things to consider
More recently, when I started watching cooking channels on youtube (The VID and the lock-down, you know), I learnt that the ability of absorbing water can differ from different brands of rice flour, even if it was made from the same type of grains. It could be the breed of rice, it could be how the rice was grind. So there is no one perfect recipe in terms of measurement. However, in terms of method, this seems to work. So, if like me, you can’t find Joshin-ko in where you live, or that it is too expensive, my best suggestion for you would be to try a few different types of rice flour and mix them to see what works best for you.
So there you go, my story about glue. Let me know if it is helpful by leaving me a comment down below. If you like it, please share it with your friends. You can also follow me on Instagram, facebook and twitter for pictures of my latest work. And of course, you can browse my work and ask for a commission on our website. Thank you for visiting, and I shall see you again in the next one. Mata ne.